Roof repair paint with fibers
Roof repair paint with fibers is a type of coating that contains fibers that are designed to provide extra strength and durability to the paint. These fibers can be made from a variety of materials such as polyester, fiberglass, or even natural fibers like cotton or wool.

The purpose of adding fibers to roof repair paint is to create a more robust and long-lasting coating that can withstand the elements. Fibers help to reinforce the paint, making it less prone to cracking, chipping, or peeling. They also help to create a smoother surface, which can improve the overall appearance of the roof.
When applying roof repair paint with fibers, it’s essential to follow the manufacturer’s instructions carefully. The fibers can sometimes settle at the bottom of the can, so it’s crucial to stir the paint thoroughly before use. Additionally, it’s important to ensure that the surface is clean, dry, and free from any debris before applying the paint.

Overall, roof repair paint with fibers can be an effective way to extend the life of your roof and protect it from damage caused by weather, UV rays, and other environmental factors. However, it’s important to choose a high-quality product and follow the application instructions carefully to ensure the best possible results.
Order now
How To apply CrylicRoof repair paint Click here
To apply acrylic roof repair paint, follow these steps:
- Clean the surface: First, you need to clean the surface where you will be applying the paint. Use a broom or a pressure washer to remove dirt, debris, and loose material from the roof.
- Prepare the Roof repair paint: Stir the paint thoroughly to ensure that it is well mixed.
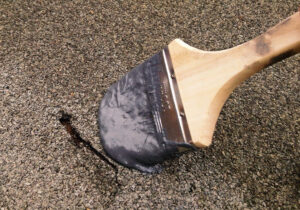
- Apply the paint: Using a paintbrush or a roller, apply the paint to the roof surface. Work in small sections, starting at one corner and moving across the roof. Be sure to apply the paint evenly and avoid leaving any thick or thin spots.
- Allow the paint to dry: Give the paint enough time to dry before applying a second coat. The drying time may vary depending on the weather conditions, so follow the manufacturer’s instructions.
- Apply a second coat: If necessary, apply a second coat of paint after the first coat has dried. This will ensure that the roof is properly sealed and protected.
- Clean up: Once you have finished applying the paint, clean up any spills or drips with water and a clean cloth. Dispose of any unused paint according to the manufacturer’s instructions.
Note: Before applying acrylic roof repair paint, read and follow the manufacturer’s instructions carefully. Ensure that you have the necessary safety equipment, such as goggles and gloves, to protect yourself during the application process.


