Step-by-step Instructions for Safe and Effective Use

Roofroll User Guides – Installation, Safety & Maintenance

Discover comprehensive instructions to ensure the successful installation, safe handling, and effective maintenance of Roofroll EPDM Lead Replacement.

Installation Process Overview

Step 1

Surface Preparation
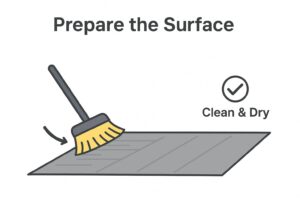
Begin by ensuring the roof surface is thoroughly cleaned and free from any debris to allow for optimal adhesion of the Roofroll EPDM Lead Replacement.
Step 1 – Prepare the Surface</p>
<p>Ensure the roof area is completely clean, dry, and free of debris, dust, or loose material.</p>
<p>Brush or sweep the surface thoroughly.</p>
<p>Check for damaged tiles, flashing, or roofing materials and repair if necessary before starting.

Step 2

Measure and Cut

Accurately measure the area where the Roofroll will be installed and cut the material to the required dimensions for a precise fit.

Step 3

Adhesive Application

Apply a consistent layer of adhesive or sealant to the prepared surface, using a brush or roller to ensure even coverage and secure placement of the Roofroll.

How to Install Chimney Flashing with GRP Roofing

Learn the essential steps for installing chimney flashing using GRP roofing materials. Our comprehensive guide ensures a seamless integration with your existing roof, providing superior protection against leaks and weather damage. Follow our expert tips to achieve a professional finish that enhances the durability and appearance of your roofing system.

Prepare the Surface

Start by ensuring the roof is completely clean and dry. Remove any debris, dust, or loose materials using a broom or brush. Inspect the area for damaged tiles or materials and repair them before proceeding.

Measure & Cut Roofroll

Unroll the Roofroll and measure the area where it will be applied. Use a tape measure for accurate dimensions and mark the material accordingly. Cut the Roofroll with sharp scissors or a utility knife, ensuring straight edges for a clean finish.

Apply Adhesive or Sealant

Choose a suitable adhesive or sealant for EPDM applications. Apply a consistent bead or thin layer across the prepared surface. For larger areas, use a roller or brush to spread the adhesive evenly, avoiding excess to prevent mess.

Position Roofroll

Carefully lay the cut Roofroll piece over the adhesive. Press it firmly into place, working from one end to the other to eliminate air pockets. Shape it around any roof features like chimneys or parapets, smoothing out wrinkles for a professional fit.

Safety & Handling

When working with Roofroll EPDM Lead Replacement, remember it is a non-toxic material that is safe to handle. It is lightweight and easy to lift, but gloves should be worn when cutting. Avoid installation during heavy rain and store the material flat in a dry place.

Maintenance & Aftercare

Essential Care for Longevity

To ensure your Roofroll EPDM Lead Replacement remains effective and durable, regular maintenance is key. Begin by inspecting the installation every 12 months to identify any potential issues early. Cleaning should be done with mild soapy water to maintain its appearance and functionality. If you notice any small gaps, reseal the joints promptly to prevent water ingress. The material is designed to withstand UV rays and ozone exposure, providing long-term protection for your roof. By following these simple steps, you can extend the life of your roofing solution and maintain its performance.

Download the Comprehensive Guide

Installation Guide For detailed instructions on installation, safety, and maintenance of the Roofroll EPDM Lead Replacement, download our full user guide. This comprehensive PDF provides step-by-step guidance to ensure a successful and safe application. Whether you’re a professional roofer or a DIY enthusiast, this guide is an invaluable resource to help you achieve the best results. Click the button below to access your copy and ensure your roofing projects are completed with confidence and precision.